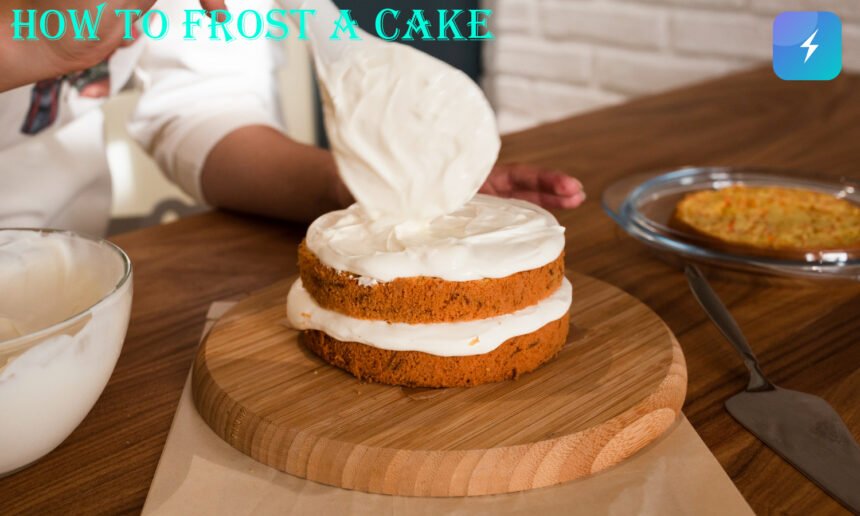
Learning how to frost a cake can turn a basic homemade dessert into something that looks polished, inviting, and celebration-ready. The good news is that you do not need professional decorating experience to get a neat finish. With properly prepared cake layers, the right frosting consistency, and a few simple tools, even a beginner can create impressive results at home.
The process becomes much easier once you understand the order of the steps. Cooling the cake, leveling the layers, applying a crumb coat, chilling, and adding the final layer of frosting all play an important role. This guide explains how to frost a cake step by step, along with practical tips for fixing common problems and getting smoother sides and cleaner edges.
What You Need to Frost a Cake
You can frost a cake with basic kitchen equipment, although a few decorating tools make the job considerably easier.
Before getting started, gather:
- Fully cooled cake layers
- Frosting or buttercream
- Cake board or serving plate
- Offset spatula
- Straight icing spatula
- Bench scraper or cake scraper
- Serrated knife or cake leveler
- Turntable, if available
- Piping bag for optional decorations
- Paper towels or a clean kitchen cloth
A rotating cake turntable is especially useful because you can move the cake while keeping your spatula or scraper relatively steady. However, it is not essential. You can still achieve a good finish by carefully rotating a serving plate by hand.
Choosing the Right Frosting
The type and consistency of frosting can make a noticeable difference when decorating a cake.
Buttercream is one of the easiest options for beginners. It spreads well, can be adjusted if it becomes too thick or soft, and works for both filling and covering many types of cakes.
Other popular options include cream cheese frosting, whipped cream frosting, chocolate ganache, and different styles of buttercream.
| Frosting Type | Ease of Use | Best For | General Texture |
|---|---|---|---|
| American buttercream | Easy | Beginners and celebration cakes | Thick and sweet |
| Cream cheese frosting | Easy to moderate | Carrot, red velvet, and spice cakes | Soft and creamy |
| Swiss meringue buttercream | Moderate | Smooth, elegant cakes | Silky and light |
| Chocolate ganache | Moderate | Chocolate cakes and drip designs | Rich and smooth |
| Whipped cream frosting | Moderate | Light cakes and fruit cakes | Soft and airy |
For a first attempt, a stable buttercream is usually a practical choice.
The frosting should be soft enough to spread without pulling pieces from the cake but firm enough to hold its shape. If you have to push extremely hard with your spatula, the frosting may be too stiff. If it continually slides down the sides, it may be too soft.
How to Prepare a Cake Before Frosting
Good cake frosting begins before you actually apply any frosting.
Never try to frost a cake that is still warm. Heat can soften or melt the frosting, causing it to slide, become greasy, or soak into the cake.
Allow the layers to cool completely first.
Some bakers also chill their cake layers before decorating. A cool, firm cake tends to produce fewer loose crumbs and can be easier to handle than a very soft, freshly baked layer.
Level the Cake Layers
Cakes sometimes develop a dome while baking. If you stack domed layers, the finished cake may lean or develop uneven gaps.
Place the cooled cake on a flat surface and use a serrated knife to carefully remove the raised portion from the top. Keep the knife as level as possible while cutting.
Do not remove more cake than necessary. The goal is simply to create a reasonably flat surface for stacking.
How to Frost a Cake Step by Step
Once your cake and frosting are prepared, you can begin assembling and decorating.
Step 1: Secure the First Cake Layer
Place a small amount of frosting in the center of your cake board or serving plate. Set the first cake layer on top.
This small dab acts like glue and helps prevent the cake from moving while you decorate it.
Check that the layer is centered before continuing.
Step 2: Add the Filling
Spoon or scoop frosting onto the center of the first layer. Use an offset spatula to spread it toward the edges.
Try to maintain an even thickness across the entire layer. Too much filling can make the layers slide, while too little can leave the cake dry and unbalanced.
If you are using a softer filling such as jam, curd, or fruit filling, pipe a ring of firm buttercream around the outside edge first. This creates a barrier that can help keep the filling inside the cake.
Step 3: Stack the Remaining Layers
Carefully position the next cake layer over the first.
Look at the cake from several directions to make sure the layers line up. Gently adjust the top layer before pressing it into position.
Continue adding filling and cake layers if you are making a taller cake.
Once everything is stacked, check that the cake appears straight. Correcting alignment now is easier than trying to fix it after the final frosting has been applied.
Apply a Crumb Coat
The crumb coat is one of the most useful techniques to learn when figuring out how to frost a cake neatly.
A crumb coat is a thin first layer of frosting that traps loose crumbs. Instead of trying to create the finished appearance immediately, you deliberately apply a light coating over the entire cake.
Spread a small amount of frosting over the top and sides. It is perfectly fine if you can still see some cake through this layer.
The goal is not appearance. It is crumb control.
Once the cake is lightly covered, place it in the refrigerator until the crumb coat becomes firm. Depending on your frosting and refrigerator, this may take roughly 20–30 minutes.
When you touch the surface gently, the frosting should feel set rather than wet or sticky.
How to Apply the Final Layer of Frosting
After the crumb coat has chilled, it is time for the visible layer.
Add a generous amount of frosting to the top of the cake. Spread it outward with an offset spatula, allowing a little excess frosting to extend beyond the edge.
Next, apply frosting around the sides.
It is usually better to start with slightly more frosting than you think you need. A sufficiently thick coating gives you room to smooth the surface without scraping down to the cake.
Once the cake is completely covered, begin refining the shape.
How to Get Smooth Frosting on a Cake
Smooth sides are often the part beginners find most challenging, but technique matters more than speed.
Hold a cake scraper vertically against the side of the cake. Keep it relatively steady while slowly rotating the turntable or plate.
Do not press too deeply. You want to remove excess frosting rather than scrape the entire coating away.
After each pass:
- Remove excess frosting from the scraper.
- Wipe the scraper clean.
- Fill visible gaps with fresh frosting.
- Scrape the sides again.
- Repeat until you are satisfied with the finish.
Trying to make everything perfect in one pass often creates more problems. Several controlled passes generally produce a cleaner result.
How to Create Clean Top Edges
After smoothing the sides, you may notice a raised ridge of frosting around the top edge.
This is normal.
Use a clean offset spatula to pull the excess frosting gently from the outside edge toward the center of the cake. Turn the cake slightly and repeat.
Clean the spatula frequently so you do not drag excess frosting across an area you have already smoothed.
Continue around the cake until the upper edge looks neat.
It may not be perfectly sharp on your first attempt, and that is fine. A clean, even edge is more important than chasing flawless bakery-style corners.
How Much Frosting Do You Need?
The amount of frosting required depends on the cake’s diameter, height, number of layers, filling thickness, and decorating style.
As a rough starting point, a standard two-layer 8-inch or 9-inch cake often requires approximately 4–5 cups of frosting for filling and covering.
You may need more if you want:
- Thick filling between layers
- Heavy piping around the cake
- Rosettes or other buttercream decorations
- A very thick outer coating
- Extra-tall cake layers
Making slightly more frosting than necessary can be helpful. Running out halfway through the final coat may make it difficult to maintain consistent texture and color.
Common Cake Frosting Mistakes to Avoid
Small mistakes can make cake decorating unnecessarily frustrating. Understanding them beforehand can save time.
Frosting a Warm Cake
This is one of the biggest problems to avoid. Warm cake can cause butter-based frosting to soften or melt.
Wait until the layers have completely cooled.
Skipping the Crumb Coat
You can sometimes frost a cake without one, but a crumb coat makes the final process much easier, particularly with soft or crumbly cakes.
It helps keep dark cake crumbs out of light-colored frosting.
Using Frosting That Is Too Stiff
Very stiff frosting can tear the cake or pull crumbs away from its surface.
If your buttercream is difficult to spread, adjust its consistency according to the recipe you are using rather than forcing it onto the cake.
Using Frosting That Is Too Soft
Overly soft frosting may sag, slide, or refuse to hold clean edges.
Temperature is often responsible. If buttercream has become too warm, cooling it briefly may help restore a workable consistency.
Scraping Away Too Much Frosting
Repeatedly pressing a scraper hard against the cake can expose the crumb coat underneath.
Use gentle, controlled pressure and fill low spots between passes.
Easy Cake Decorating Ideas After Frosting
A perfectly smooth cake is not your only option. In fact, intentionally textured frosting can look beautiful and is often easier for beginners.
Once your cake is covered, you can try:
- Creating swirls with the back of a spoon
- Making horizontal lines around the sides
- Adding piped borders
- Decorating with fresh fruit
- Adding chocolate shavings
- Using sprinkles around the base
- Piping simple stars or rosettes
- Creating a rustic textured finish
If your smooth frosting is not turning out exactly as planned, turning the surface into a deliberate texture can transform the cake without starting over.
How to Frost a Cake Without Special Tools
You do not need a professional decorating kit.
If you do not own an offset spatula, a regular butter knife or another flat kitchen utensil can work for simple designs. A large flat-edged scraper can sometimes substitute for a cake scraper, provided it is clean and suitable for food preparation.
You can also place the cake on a regular plate instead of a turntable. Rotate the plate a small amount at a time as you work.
The final result might be more rustic, but the fundamental method remains the same: stack carefully, crumb coat, chill, add the final frosting, and smooth or texture the surface.
How to Fix Common Frosting Problems
Even experienced home bakers sometimes need to correct their frosting.
If crumbs appear in the final layer, avoid repeatedly spreading them around. Remove the affected frosting if possible, chill the cake, and cover the area with clean frosting.
For small holes or uneven areas, add a little frosting directly to the low spot before scraping again.
If the sides look uneven, view the cake at eye level. This makes it easier to identify areas that need additional frosting.
When buttercream feels too warm and difficult to control, chilling the cake briefly can help. Avoid excessive chilling between every small adjustment, however, because very cold frosting can sometimes be harder to blend seamlessly with newly added frosting.
Tips for Better Results
Frosting cakes becomes easier with practice, but a few habits can improve your results immediately.
- Make sure every layer is completely cool.
- Level noticeably domed cakes before stacking.
- Keep the filling relatively even.
- Check layer alignment as you build the cake.
- Always use a crumb coat when dealing with a crumbly cake.
- Keep your scraper and spatula clean.
- Work with a manageable frosting consistency.
- Use light pressure when smoothing.
- Correct small imperfections instead of repeatedly scraping the whole cake.
- Choose a textured finish if perfectly smooth frosting becomes frustrating.
Most importantly, work patiently. Cake decorating is easier when you make small corrections rather than trying to perfect the entire surface at once.
Final Thoughts
Learning how to frost a cake is mostly about preparation, frosting consistency, and patience. Start with completely cooled and reasonably level cake layers, add an even filling, and make sure everything is aligned before covering the outside.
A thin crumb coat followed by chilling can make the final layer significantly easier to apply. From there, add enough frosting to cover the cake generously and use a clean scraper or spatula to refine the surface a little at a time.
Your first cake does not need perfectly sharp edges or flawless sides to look impressive. A smooth finish, simple swirls, piped decorations, or even an intentionally rustic texture can all produce a beautiful homemade cake. Once you understand the basic process, each cake you frost becomes an opportunity to improve your technique and experiment with new decorating styles.
FAQs About How to Frost a Cake
Should I refrigerate a cake before frosting it?
The cake should at least be completely cool before you begin. Chilling the layers can also make them firmer and easier to handle, especially if the cake is soft or crumbly. Avoid frosting a warm cake because the frosting may soften or melt.
What is the easiest frosting for beginners?
American buttercream is often a beginner-friendly choice because it is relatively simple to prepare, easy to spread, and suitable for many decorating techniques. Its consistency can also usually be adjusted when needed.
How do you frost a cake without getting crumbs everywhere?
Apply a thin crumb coat first. This initial layer captures loose crumbs. Chill the cake until the crumb coat is firm, then spread fresh frosting over it to create the final finish.
Why does my frosting keep pulling off the cake?
The frosting may be too stiff, the cake may be very crumbly, or you may be applying too much pressure. Using softer, spreadable frosting and applying a crumb coat can make the process much easier.
How do I make cake frosting look smooth?
Cover the cake with enough frosting and hold a clean cake scraper vertically against the sides while slowly rotating the cake. Fill low spots and repeat with gentle pressure. For the top, pull excess frosting from the outer edge toward the center using a clean offset spatula.
Can I frost a cake the day before serving it?
Many frosted cakes can be prepared a day in advance, but proper storage depends on the cake, filling, and frosting you use. Cakes containing ingredients that require refrigeration should be kept refrigerated. Always follow the storage guidance for your specific recipe.